
How to obtain a LetsEncrypt wildcard certificate with certbot
Introduction
Keep in mind that this is the manual process of responding to dns challenges. We've created acmehelper for this unique purpose - to handle most of the complexity of this process in a easy, safe, reliable and fully automated manner. You can sign up here - is free forever for one domain! No credit card information required!
Now that the sales pitch is out of the way, let's start!
First thing first, we'll need to a pick an OS and version. Since Linux is powering over 95% of the top one million domains we'll go with Linux. For distribution CentOS and Ubuntu are the most popular ones for servers with Ubuntu having a very small lead.
We'll pick Ubuntu 14.04 LTS - Trusty Tahr for this tutorial.
If you use another distribution the only different step is installing certbot, you can find out how to do that for your distribution here on the Electronic Frontier Foundation web site.
Select from the left drop-down None of the above and your system on the right dropdown:

Note that we didn't pick a web server as we don't care at this point. We want a wildcard certificate that we can use to secure multiple services: web, email, vpn, etc.
Step 1 - Installing certbot
Since we plan on using certbot we need to get it installed on our server.
Certbot is under active development and the team maintains a software repository with up-to-date versions. We'll use that repository.
So let's update our existing installation and add the packages needed to install additional repositories:
$ sudo apt-get update
$ sudo apt-get install software-properties-common
Now let's add the repository:
$ sudo add-apt-repository ppa:certbot/certbotYou'll need to press ENTER to accept. After that we'll update the repository information again but this time also retrieving the packages from certbot repository.
$ sudo apt-get updateIs time to install certbot:
$ sudo apt-get install certbotPress 'y' to accept the packages and we're done with this part.
Now is time for the fun part!
Step 2 - Requesting the certificate
The next command is quite long but I'll explain what each option does:
$ sudo certbot certonly \
    --server https://acme-v02.api.letsencrypt.org/directory \
    --manual --preferred-challenges dns \
    --register-unsafely-without-email \
-d example.com -d *.example.com-
certonly we want only the certificate, we don't want certbot to configure nginx, apache or any other web server for us.
-
server the current acme endpoint (v1) doesn't support wildcard certificates. We'll be using v2 - the new one - that does.
-
manual we will respond to the challenge manually by adding/editing a DNS challenge entry
-
preferred-challenges we have to use dns challenges for wildcard certificates
-
register-unsafely-without-email this option instructs letsencrypt that we don't want to be notified by email when our certificate is about to expire. If you do want to get notifications and plan to use the certificate obtained in production leave this option out and fill out the email address when required.
-
*_-d example.com -d .example.com_** the wildcard certificate will be for example.com and all the direct subdomains (www.example.com, cdn.example.com and so on). A direct domain is required even you don't plan to use the certificate for the domain itself but only for subdomains. If you want a certificate for a subdomain (like dev.example.com) the same steps apply, you just need to replace _acme-challenge with _acme-challenge.dev as the DNS record name.
You will be prompted with the following message:
-------------------------------------------------------------------------------
NOTE: The IP of this machine will be publicly logged as having requested this
certificate. If you're running certbot in manual mode on a machine that is not
your server, please ensure you're okay with that.

Are you OK with your IP being logged?
-------------------------------------------------------------------------------
(Y)es/(N)o:
You have to agree to continue. So hit "y".
The next message will be similar to:
-------------------------------------------------------------------------------
Please deploy a DNS TXT record under the name
_acme-challenge.example.com with the following value:

1jU5ggOe8ZDG3-1OXsQvwfQ-6aIH0DS-_cZEoVTdX4s

Before continuing, verify the record is deployed.
-------------------------------------------------------------------------------
Press Enter to ContinueWe need to setup the dns entry first. For the following commands open a new console window on the same server or on the local machine, it doesn't matter.
Step 3 - Install dig to verify DNS records
We'll leave certbot waiting and move on to setting up the dns record to respond to the first challenge. I recall reading on a mailing list that there is a deadline of 24 hours to respond to challenges but I wouldn't bet on this information. We will not need more than a few minutes anyway.
Before we begin let's install one very useful tool for dealing with dns queries, dig which is an alternative to nslookup. Is my default 'goto' tool for dns issues and is also available for mac; it comes as part as the default installation or can be installed trough homebrew as part of the bind package. It's also likely to be installed on most linux distributions.
All the following commands can also be replaced with nslookup equivalents but for simplicity sake we'll stick only to the dig version.
In case is not available on your server let's install it quick:
$ sudo apt-get install dnsutilsCheck that is properly installed:
$ dig +short google.comStep 4 - Add the challenge DNS record
The step-by-step information is provided for namecheap.com but for other registrars/dns systems the same technique applies. You'll miss the pretty screenshots though.
Step 4.1 - Login to your dns admin panel
Login to your namecheap web console using Account/Dashboard from the top/right or Sign In menu on the top left.
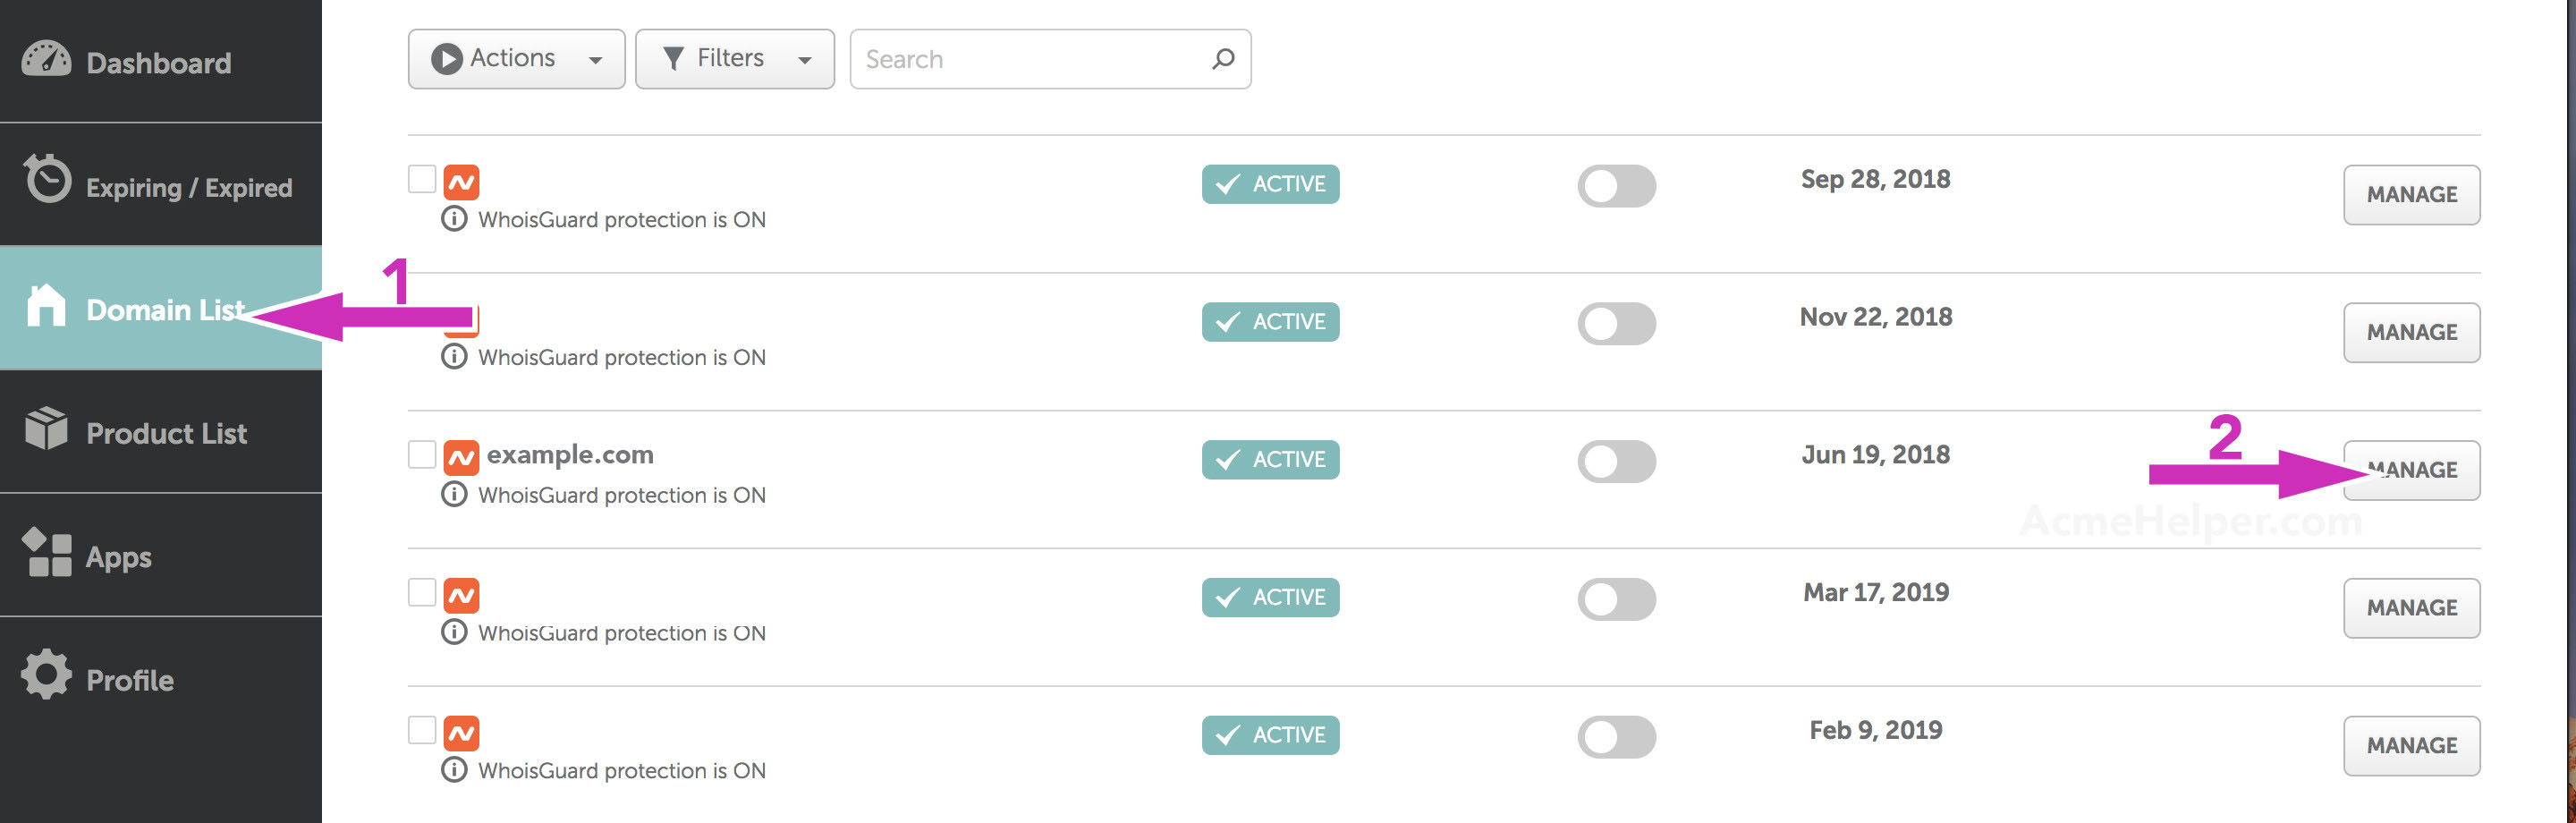
Once inside your namecheap console select Domains from the left side list and Manage for the domain you want to get the wildcard certificate for.
You can also use Manage directly from the Dashboard list if your domain is visible:
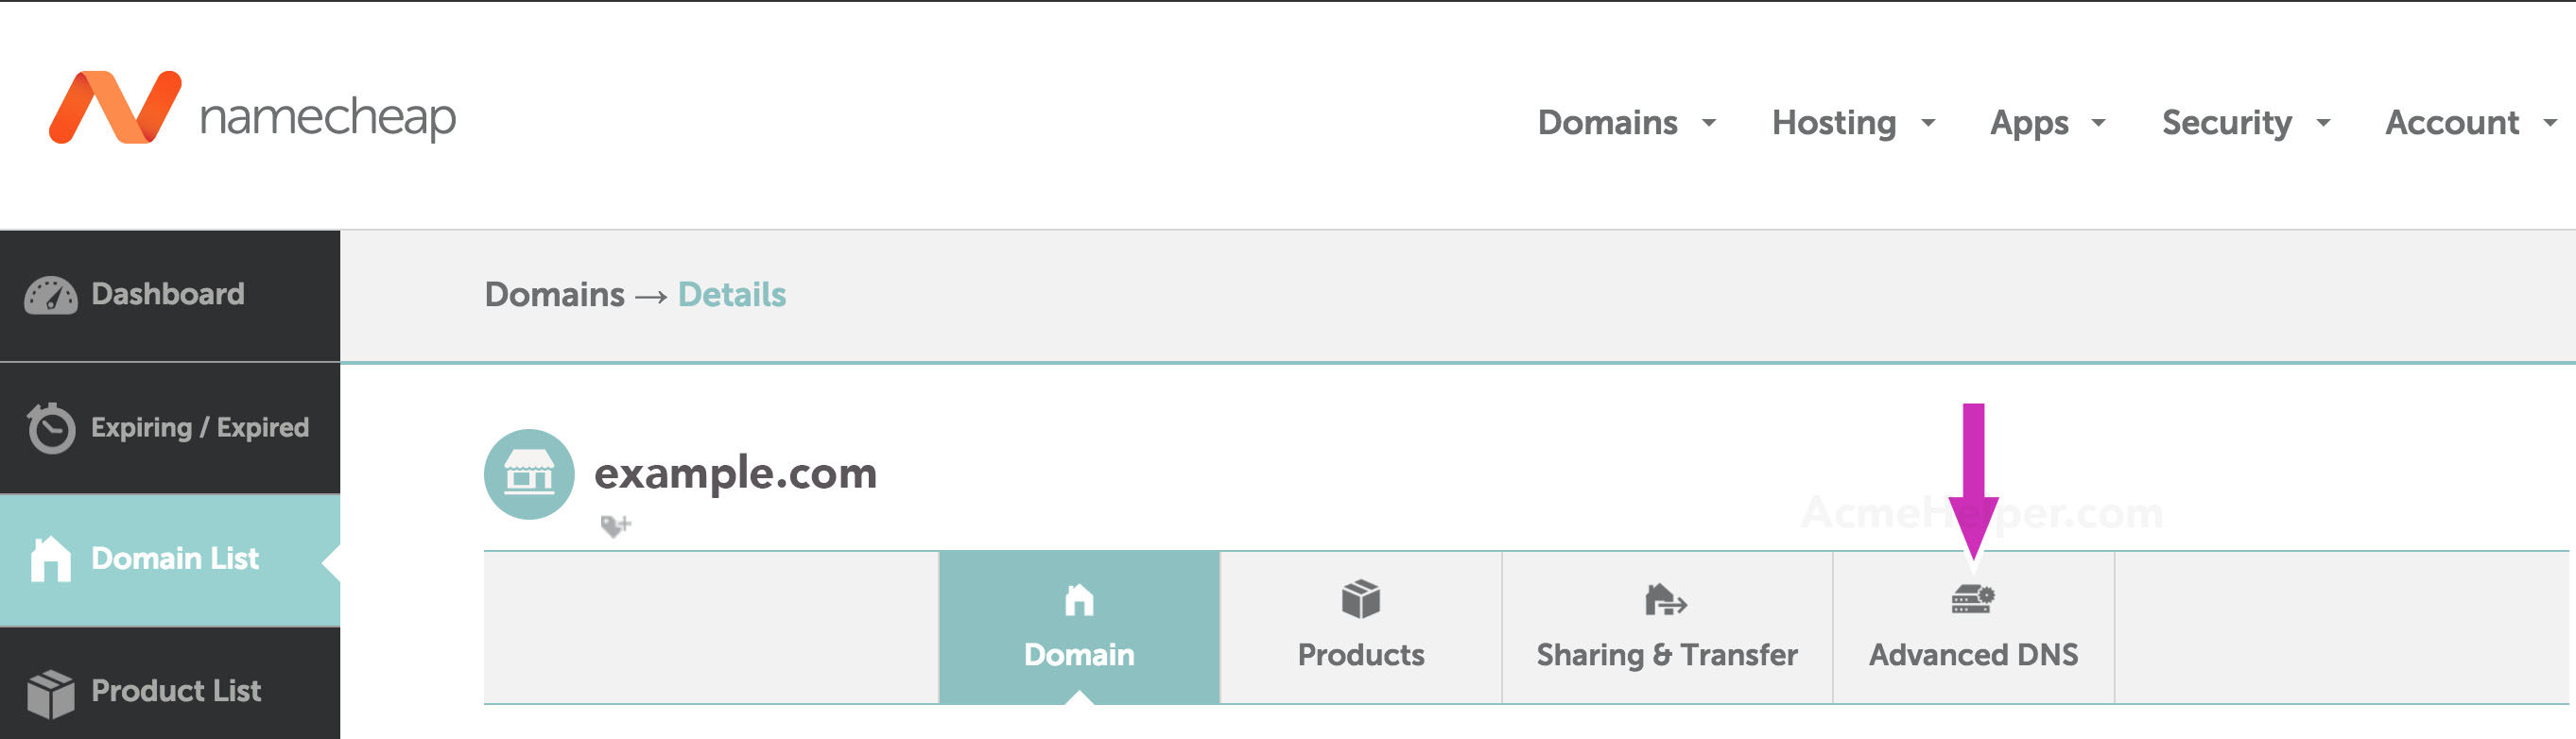
Now select Advanced DNS on the top right:
Step 4.2 - Add the challenge entry
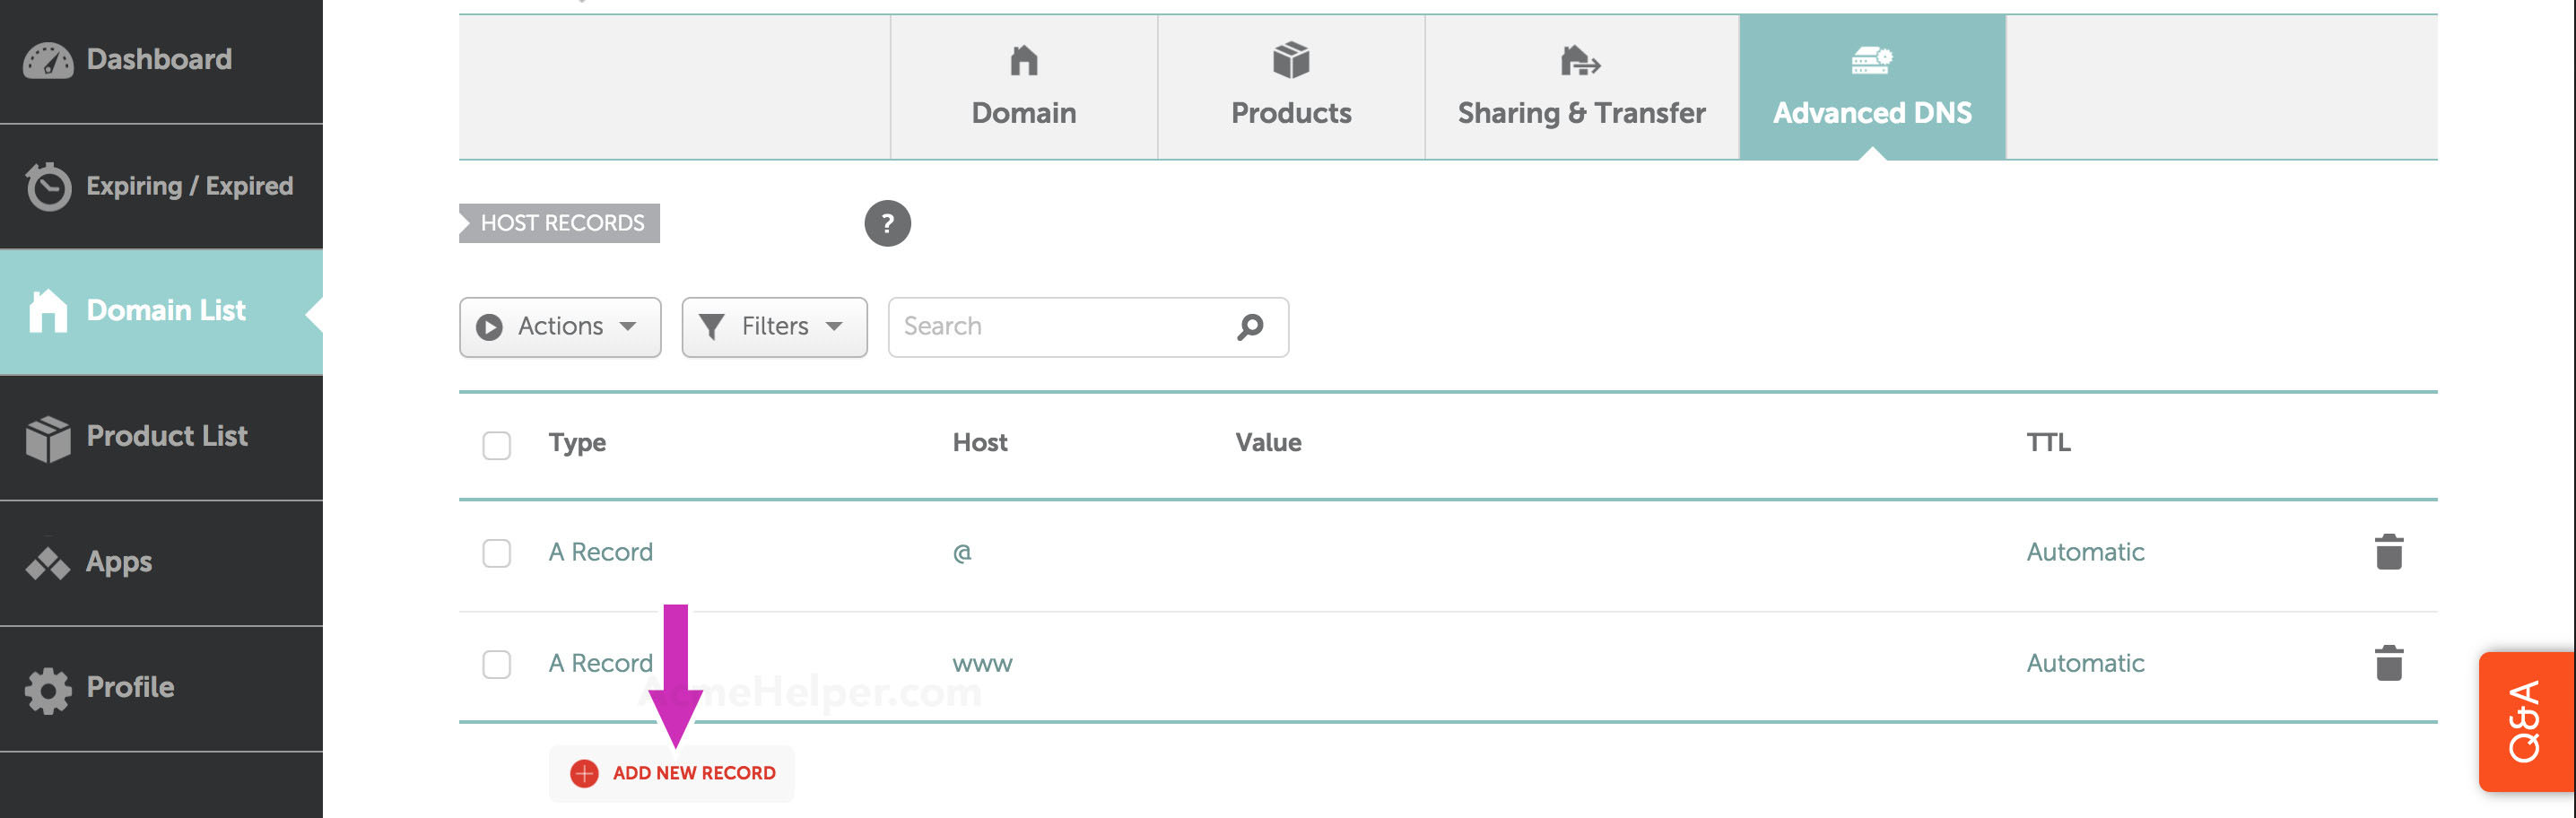
Click the Add new record link:
Select from the dropdown TXT as record type:

For host enter _acme-challenge and as value the value provided by certbot. For TTL we'll use the lowest possible value, in this case 1 minute. Hit Save all changes when you're done.

Step 4.3 - Verifying the entry
Is time to get back to the console and see if our entry is ready to be propagated.
First let's see what our domain nameservers are:
$ dig +short NS example.comYou should get a response similar to:
dns1.registrar-servers.com.
dns2.registrar-servers.com.
Let's see if the first of those nameservers has received and processed our DNS record request:
$ dig +short TXT _acme-challenge.example.com @dns1.registrar-servers.comIf the dns record was processed you will get your value string back:
"1jU5ggOe8ZDG3-1OXsQvwfQ-6aIH0DS-_cZEoVTdX4s"If the command returns without any string the record was not added yet.
Normally it takes a few minutes to be processed. If it's still not available after 5 minutes go back and double check that you entered the record correctly. Sometimes it helps to delete it in the dns control panel and add the record again or change the TTL to a slightly different value (such as 2 or 5 minutes) if the request is not processed. It does happen and the official timeline for dns propagation is 24-48 hours so we cannot reach out for support yet.
Once the challenge value is returned by the first server is time to check if the change is propagated to the other servers:
$ dig +short TXT _acme-challenge.example.com @dns2.registrar-servers.comGiven that there is no way to know for sure which server will be used during challenge validation (there is a rumor that the primary name server is used - the one from SOA record) I strongly suggest to verify all dns servers returned by dig NS for your domain and wait for the record to propagate to all of them.
Now that all dns servers have our record is time to move back to certbot!
Step 5 - Letting certbot know that we added the first challenge entry
Go back to the first console where you let certbot waiting and hit enter. You will get a second challenge and the already familiar message Press Enter to Continue.
Instead repeat Step 4 but with the second challenge value. Also make sure that you do not modify the first entry but add a new one with the same name and the new (different) value!
Technically they can both be added at the same time but I didn't want to make things too complicated the first time around.
Once step 4 is completed (again) for the second challenge the certbot console output should look like this:
 Plugins selected: Authenticator manual, Installer None
Obtaining a new certificate
Performing the following challenges:
dns-01 challenge for example.com
dns-01 challenge for example.com

-------------------------------------------------------------------------------
NOTE: The IP of this machine will be publicly logged as having requested this
certificate. If you're running certbot in manual mode on a machine that is not
your server, please ensure you're okay with that.

Are you OK with your IP being logged?
-------------------------------------------------------------------------------
(Y)es/(N)o: y

-------------------------------------------------------------------------------
Please deploy a DNS TXT record under the name
_acme-challenge.example.com with the following value:

1jU5ggOe8ZDG3-1OXsQvwfQ-6aIH0DS-_cZEoVTdX4s

Before continuing, verify the record is deployed.
-------------------------------------------------------------------------------
Press Enter to Continue

-------------------------------------------------------------------------------
Please deploy a DNS TXT record under the name
_acme-challenge.example.com with the following value:

7e9huNGe45fXdZiNEyXTeel-IBCc0bj1KcO74IuVxDA

Before continuing, verify the record is deployed.
-------------------------------------------------------------------------------
Press Enter to Continue
And the dig response like this:
"1jU5ggOe8ZDG3-1OXsQvwfQ-6aIH0DS-_cZEoVTdX4s"
"7e9huNGe45fXdZiNEyXTeel-IBCc0bj1KcO74IuVxDA"
If you got so far double check that the two strings are identical in the certbot challenge request and dig response.
Step 6 - check the dns records using google dns servers
This is another piece of information I picked along the way but unlike the challenge deadline I would bet on it. Maybe not the house but a friendly wager definitely - letsencrypt uses google public dns servers for dns records validation. So let's see if google picks up our record:
$ dig +short TXT _acme-challenge.example.com @8.8.8.8
$ dig +short TXT _acme-challenge.example.com @8.8.4.4
If you get the expected responses we're golden! If not, keep reading.
Is time to drop the training wheels and use dig without "+short":
$ dig TXT _acme-challenge.example.com @8.8.8.8In the answer section you'll get something similar to this if the record is not available:
;; AUTHORITY SECTION:

example.com.        1155    IN  SOA sns.dns.icann.org. noc.dns.icann.org. 2018013058 7200 3600 1209600 3600
Or like this if you have a valid record but presumably with the wrong value - different from what certbot expects:
;; ANSWER SECTION:
_acme-challenge.example.com. 1155 IN    TXT "5jU5ggOe8ZDG3-1OXsQvwfQ-6aIH0DS-_cZEoVTdX4s"
What we care about is the first number (1155 in my response), right after the domain name - you didn't forget to replace example.com with your domain, did you?
That number represents the number of seconds the dns server has the response cached. Normally your response expires in less than a minute (that's why the "lowest possible value" in step 4.2) but in case it's higher it means that you either picked a higher value for TTL or that you had another value before we started and is cached.
There isn't much you can do but wait for it to count to zero. Make sure that you go back and double check each step and value while you wait and go get a coffee, tee or beer.
Step 7 - Getting our wildcard certificate!
Let's recap what we did so far:
- installed certbot
- requested a wildcard certificate from letsencrypt using a convoluted command
- added two DNS entries to the challenges requested as proof that we control the domain
- verified the records on our domain DNS servers
- verified that the records are successfully propagating trough the internet (using a 3rd party dns servers - google's)
Is time to finally get our certificate!
Go back to the waiting certbot console and hit enter... wait a few secods ... and BAM!
Waiting for verification...
Cleaning up challenges

IMPORTANT NOTES:
 - Congratulations! Your certificate and chain have been saved at...
Now that you have successfully responded to the dns challenges and obtained your certificate you can go back to your dns control panel and delete the _acme-challenge entries.
Final comments
Certbot will say that:
To obtain a new or tweaked version of this certificate in the future,
   simply run certbot again.
Which is 100% true for http challenges certificates but only partially true for certificates using dns challenges (including all wildcard certificates).
The challenge remains valid for one month meaning that you can request a new certificate if something happens to the old one for 30 days without having to respond to a new challenge - you'll need the information about the challenge that is being saved in /etc/letsencrypt though.
To renew the certificate after more than 30 days (it expires in 90 days from the date it was issued) you'll have to answer a new set of challenges. You can go trough the same process of adding the dns entries all over again or you can use our service built to handle challenges in a safe, secure and easy manner, acmehelper.com.
Be the first to comment!